Tuesday, February 24, 2009
Thursday, February 19, 2009
Family Photo Box
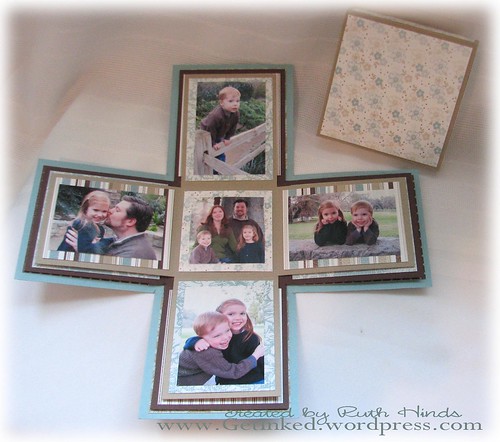
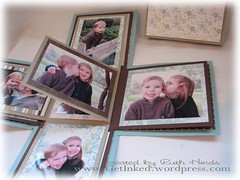
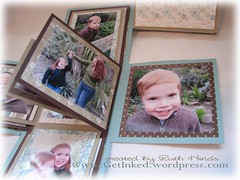
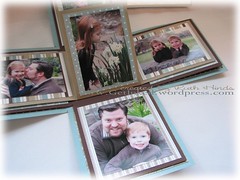
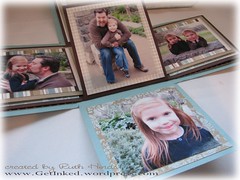
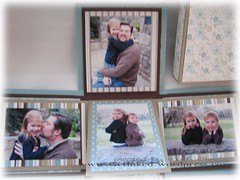
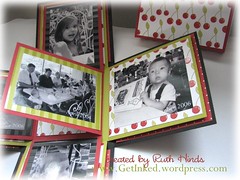
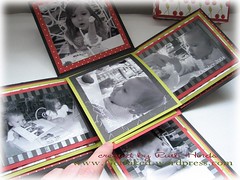
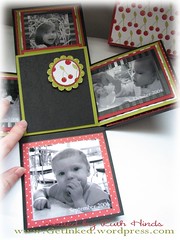
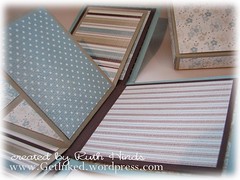
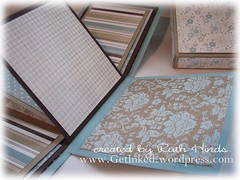
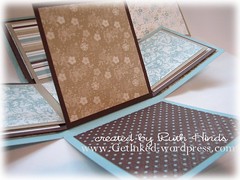
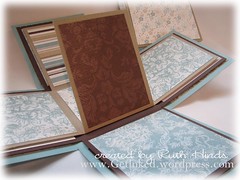
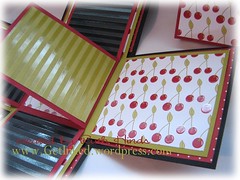
Here is my Parisian Breeze Photo Explosion Box with my family photos added to it. We took these pictures at a favorite park a couple of weeks ago.
I love how it turned out! It looks very different than my finished Rockabilly box, even though the design is exactly the same.
Click on the photos to enlarge.
I love how it turned out! It looks very different than my finished Rockabilly box, even though the design is exactly the same.
Click on the photos to enlarge.
Unfortunately, it's too late to sign up for my Explosion Box class for this Saturday. But if you'd like to learn how to make these, just find at least two other friends who would also like to take the class, and we'll schedule another one on a date that works for you.
Tuesday, February 17, 2009
Strawberry Tag & Card
My daughter had a birthday party to go to this afternoon. She picked out some cute Strawberry Shortcake gifts and a tote (It was really cheap, but super cute. It reminds me of Stampin' Up!'s Raspberry Tart DSP) to use as the gift bag.
I went with the gift's theme and made a matching tag and 3x3 card. Very simple and fast.
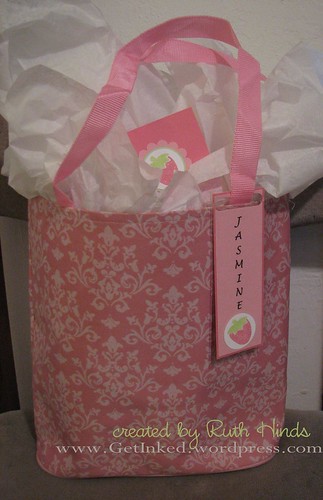
I ran some Pretty in Pink card stock through my printer to add the little girl's name. Then I layered it onto Regal Rose card stock. I whipped out a couple of sweet strawberries from the Tart & Tangy stamp set using Regal Rose & Gable Green markers for both the tag & the card. Then I punched them out with the circle punches.

I made a hole in the top of the tag with the Word Window Punch. Then I covered the whole thing with a long strip of packing tape on both sides (I don't have a laminator, and this actually worked really well!). Then I punched a smaller hole through the top again with the Horizontal Slot Punch to allow the handle to go through the tag.

I love using stamps to quickly personalize a store-bought gift! Don't you?
Wednesday, February 11, 2009
Icecream Photo Box
**Today is the last day to sign up for my Photo Explosion Box Class!**
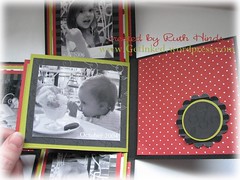
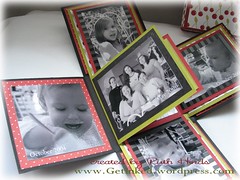
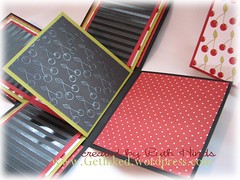
So, I finally found a few minutes to take some photos of my Rockabilly Photo Explosion Box with the photos I added to it. As I mentioned before, I had decided to go with an icecream theme: more specifically, photos taken at our favorite icecream parlor: Leatherby's Family Creamery.
If you thought my box was cute before, just look at it now! Priceless! Yes, once you add your personal photos to a project, the completed item means so much more.
I made all the photos (which span over the last 4 1/2 years) black and white to help the project visually flow and so there wouldn't be any clashing with colors. Also, B&W really goes well with the colors of the box.
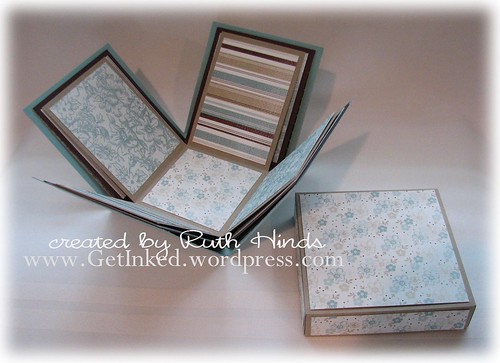
I haven't added photos to my Parisian Breeze box yet. I took my family out to a nice park last week and we got a ton of photos. I've almost finished narrowing them down. That box will be a little different from this one. 1) I'll be using color photos. 2) There won't be any panels left blank (I may even put a photo on the center square). When I finish it, I'll take pics to show you.
So, I finally found a few minutes to take some photos of my Rockabilly Photo Explosion Box with the photos I added to it. As I mentioned before, I had decided to go with an icecream theme: more specifically, photos taken at our favorite icecream parlor: Leatherby's Family Creamery.
If you thought my box was cute before, just look at it now! Priceless! Yes, once you add your personal photos to a project, the completed item means so much more.
I made all the photos (which span over the last 4 1/2 years) black and white to help the project visually flow and so there wouldn't be any clashing with colors. Also, B&W really goes well with the colors of the box.
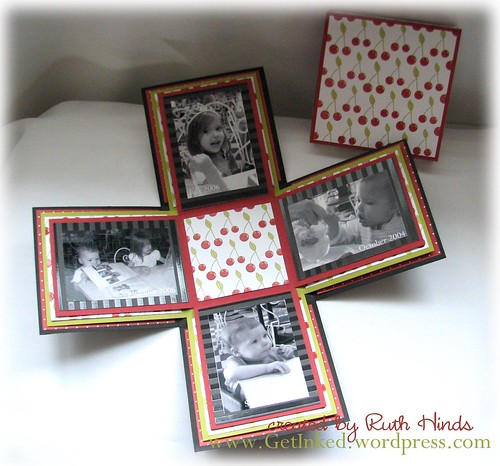
You'll notice that some of the sections don't have a photo. I added accents simply by punching out leftover scraps from the project with the scallop circle and other circle punches. (When I hold the class, I'll have my punches available so the class participants can do the same, if they like.) I'll probably add journaling to those sections later.
I haven't added photos to my Parisian Breeze box yet. I took my family out to a nice park last week and we got a ton of photos. I've almost finished narrowing them down. That box will be a little different from this one. 1) I'll be using color photos. 2) There won't be any panels left blank (I may even put a photo on the center square). When I finish it, I'll take pics to show you.
Thursday, February 5, 2009
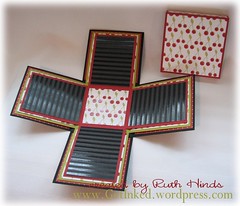
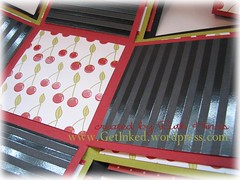
Photo Explosion Boxes
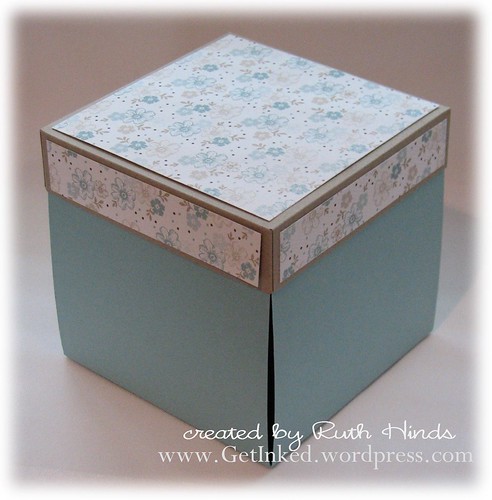
Last week I got my order of new Stampin' Up! supplies and in it was the new Rockabilly Specialty and Parisian Breeze Specialty Papers. They are beautiful!!!
I made some adorable photo boxes with them. I'll be teaching how to make these boxes at my Photo Explosion Box Class on Saturday February 21st @ 2pm. Class members will choose whether they want to make the Rockabilly or Parisian Breeze box when the sign up. If you'd like to join us, please be sure to contact me by Weds Feb 11th, as I'll need to order the supplies. (Class members will need to bring their own paper cutter with a scoring blade and their own adhesive. Thanks!) ETA: Class fee is $20 ($18 for current stamp club members.)
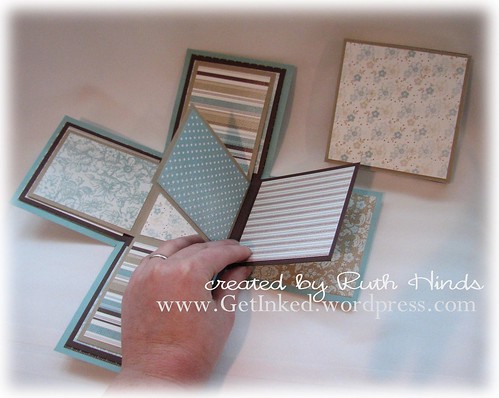
You’ll take your box home all ready to add your photos. Plus, you'll take home the instructions and templates. Photo boxes make a great gift to keep on a desk or coffee table!
(Click on individual photos below to enlarge.)
Here's the Parisian Breeze Specialty box. I wish you could reach right through the computer to feel this paper! It is textured, and much heavier than our normal designer papers- almost as thick as our card stock. It is very nice!
I made some adorable photo boxes with them. I'll be teaching how to make these boxes at my Photo Explosion Box Class on Saturday February 21st @ 2pm. Class members will choose whether they want to make the Rockabilly or Parisian Breeze box when the sign up. If you'd like to join us, please be sure to contact me by Weds Feb 11th, as I'll need to order the supplies. (Class members will need to bring their own paper cutter with a scoring blade and their own adhesive. Thanks!) ETA: Class fee is $20 ($18 for current stamp club members.)
You’ll take your box home all ready to add your photos. Plus, you'll take home the instructions and templates. Photo boxes make a great gift to keep on a desk or coffee table!
(Click on individual photos below to enlarge.)
Here's the Parisian Breeze Specialty box. I wish you could reach right through the computer to feel this paper! It is textured, and much heavier than our normal designer papers- almost as thick as our card stock. It is very nice!
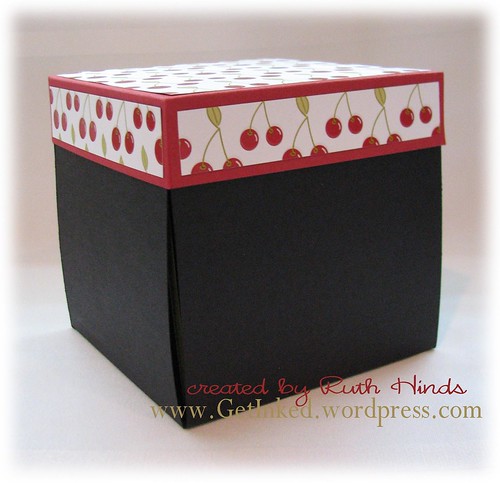
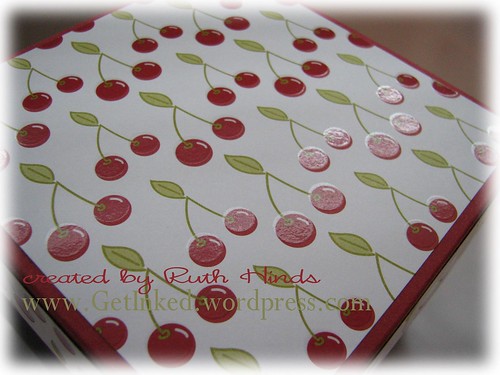
And this is the Rockabilly Specialty box. I love the glossy design on these papers! What I also love is that on each sheet in the pack, on one side is a very classic pattern: either stripes or polka dots, and on the other side is a trendy pattern like skulls and crossbones or cherries. I was initially going to go with just classic stripes and dots and my box. But then I decided that I'd be using photos taken at a favorite ice cream parlor, so I used some cherries. Too cute!
When you make your own box, you'll get to choose which sides of the papers you want to use and where in the box they will go.
I'll be adding photos to these boxes soon, and will post new pics then.
Claim your spot now!
Tuesday, February 3, 2009
Attention Business Stampers
 If there are any other Stampin' Up! Demonstrators reading my blog, this one's for you. :)
I'm really excited about a new Coaching Group I've joined. Its called the Business Stampers Coaching Group, and it is through John Sanpietro. I've used John as my Business Coach before, and he is fantastic!
He knows the ins and outs of our business and he tells you just what you should do to maximize your time, money and efforts. I know Stampin' Up! Founders Circle demonstrators who swear by him. Over 60% of his clients earn the cruise.
Anyway if you'd like more info on this coaching group (which includes a monthly conference call, business-oriented message boards, and more) click here.
Plus, if you sign up today (2/3/09), you'll be a Founding Member which means you get a discounted monthly rate. But, I have to say, the information and support from this group is really worth the normal rate!
Monday, February 2, 2009
Free Catalog!

Get a free Idea Book & Catalog with every online purchase! No minimum order required. Feel free to combine this with other specials (like SALE-A-BRATION, see previous post).
Simply click here to enter the online store through my business website. (Click "Shop Now" at the top of the home page.)
Stampin' Up! will give away free catalogs to the first 22,000 online orders, or until April 30th, '09.
If you already have a catalog, share any extras with a friend!
Simply click here to enter the online store through my business website. (Click "Shop Now" at the top of the home page.)
Stampin' Up! will give away free catalogs to the first 22,000 online orders, or until April 30th, '09.
If you already have a catalog, share any extras with a friend!
Subscribe to:
Posts (Atom)